The Books We Read and the Things We Did: Part II
Creative Builders
This class was all about making a different project each week involving at least one recycled material. The children were given a direction based on the primary recycled item and provided with lots of other materials and then were let free to go wild, using their imaginations and ideas to build and create. I helped with technical difficulties and problem solving how to make their visions work with the mundane reality and limitations of available supplies (there being no child-safe rocket fuel, for example).
We covered a wide range of things to learn about and they absolutely loved it; art, creativity, individual expression, construction, problem-solving, critical thinking, biology, chemistry, geology, physics, botany, agriculture, astronomy, and nature. And every week we discussed what items we were recycling, reusing, and repurposing into something else, so environmental science as well. Yes, this was a preschool class with four-year-olds and yes, they got it - and good, because they are the future.
 |
| Pipe cleaners, glue, scissors, tissue boxes, milk carton lids and more - young children naturally embrace it all and have fun creating. |
To me it was clear with which book I should start Creative Builders: Not a Box by Antoinette Portis (Harper Collins, 2006). This wonderful book about imaginary play based around a box as a prop sparked a discussion about imagination, followed by what is meant by the terms recycling,
reusing, and repurposing. Then we got busy with empty tissue boxes and a
bunch of materials and items with which to decorate, design, imagine, build and
create.
 |
| Ready to make rain sticks |
 |
| Completed rain sticks - individually decorated! |
And what could I follow up with next but Not a Stick by Antoinette Portis (Harper Collins, 2007)? The children turned paper towel tubes into "rain sticks" using
packing peanuts and aquarium gravel. Along the way there was lots of spy glasses, telescopes, swords, and simple poking sticks in use.
 |
| Sleepy seedlings slowly growing |
A Seed is Sleepy by Dianna Aston and Sylvia Long (Chronicle Books, 2014) introduced a day of indoor gardening. We took food packaging containers made
out of biodegradable cardboard and repurposed them into garden pots. The children took turns stirring water
into potting soil and then chose between lettuce, marigold, and
radish seeds. After planting their seeds we took the pots down the hall
to a big windowsill that gets lots of sun and placed them under a greenhouse cover to keep them warm.
 |
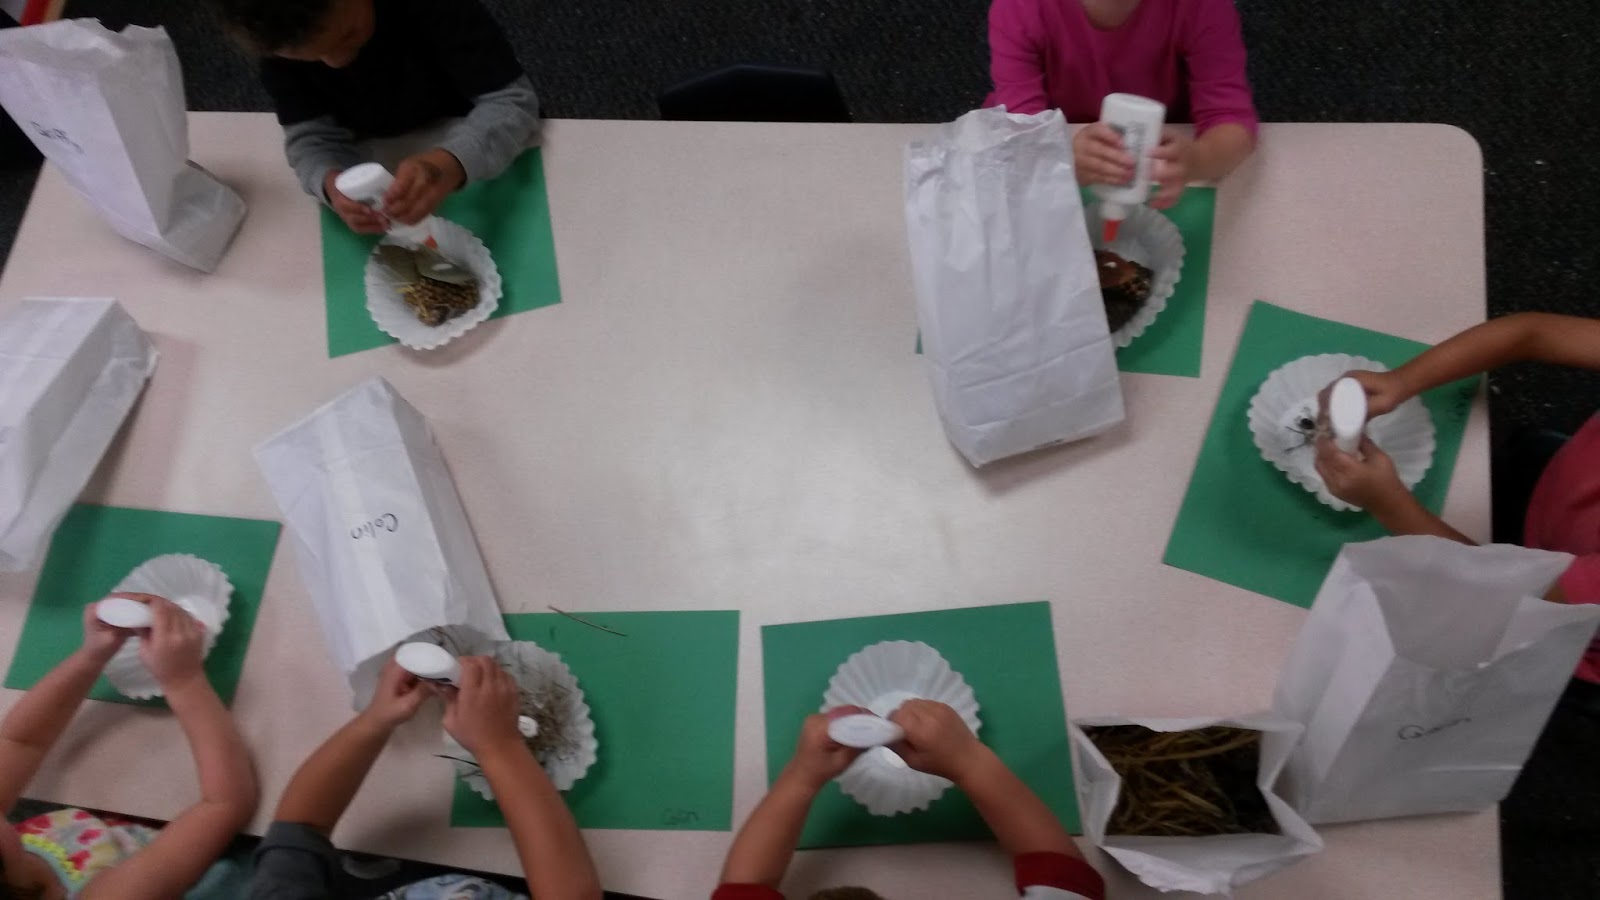
| Dumping glue on straw, twigs, stones, bits of moss! |
 |
| It's endlessly fascinating to me. Provide young children with the same materials, or the same source of materials, and they just do their own thing. |
 |
| I love this age, because they innately love to learn - and embrace the freedom to create on their own. |
 |
| Creative Bird Nests |
A Seed Needs Sun by Kate Riggs and Fiammetta Dogi (Creative Editions, 2014) gave an overview of what we had done the previous week to get our seeds started (provided soil, water, and sun). The children then observed the progress
of their plantings - everything was sprouting, and since they planted different
seeds, the seedlings were growing at different rates and looked different from
each other. Everyone spritzed their own container. Then we read A Nest is Noisy by Dianna Hutts Alston and Sylvia
Long (Chronicle Books, 2017) before heading out to the nature center to gather any and all
natural materials. Back in the classroom they constructed their own nests
inside a repurposed coffee filter.
 |
| Choosing colourful magnetic and non-magnetic bits and bobs. |
 |
| Testing what is and isn't magnetic with a magnet wand. |
 |
| Magnetic Discovery Bottles |
What Makes A Magnet by Franklyn M. Branley and True
Kelly (HarperCollins, 2016) helped the children understand the basis of how magnets work and what materials are magnetic and why. This enabled them to make good predictions as to what supply items would be magnetic and which would not: the only thing that they didn't guess correctly was pipe cleaners, and this is understandable - they didn't know that wires were inside the fluffy covering. Then to test their predictions, they put their own mix of magnetic and non-magnetic items into a recycled water bottle, filled it with mineral oil (to prevent rusting), and used a magnetic wand to see what it attracted, and what it did not. Plus it is just fun to wave the wand up and down and watch all the colourful bits follow.
 |
| Roller Coasters in Progress |
Roller
Coaster by Marla Frazee (HMH Books for Young Readers, 2006) sparked a discussion about what amusement parks the children had visited and what rides they got to go on - and which they were too small for. And as it turns out, the only thing more exciting than talking about going to amusement parks is getting to take home marbles at the end of the day. In between the children constructed roller coasters out of paper towel tubes and tape, pipe cleaners, and brads. I must say, watching the various and highly individual designs emerge was amazing. Almost as amazing as getting to take real marbles home. Almost.
 |
| Outer Space Sensory Bin |
 |
| Rocket Ready |
 |
| Every Rocket Ship Was Unique |
 |
| Straws Became Fuel Lines |
 |
| Sauce Bottles Now Carried Rocket Fuel |
 |
| Duct Tape Can Build the World (* this is what my oldest child purchased with his first allowance!) |
There's No Place Like Space: All About Our Solar System
by Tish Rabe and Aristides
Ruiz (Random House Books for Young Readers, 1999) introduced the children to a lot of space info and terms in a fun and engaging way. We continued discovering space with a sensory bin and had an
absolute blast (er, pardon!) building their own rocket ships, using
recycled tea tins as the base material.
 |
| Carefully Mixing Solutions |
 |
| Eggshells Full of Brightly Coloured Solutions |
 |
| Crystals Begin to Form |
 |
| Each Eggshell Crystal Geode Was Gorgeous |
 |
| The different solutions produced crystals of differing shapes |
 |
| Sometimes the crystals formed mostly around the edge of the eggshell, and sometimes at the bottom. |
 |
| The crystals were all different colours too, chosen by the children while mixing the sollutions |
 |
| Gorgeous, just gorgeous |
 |
| I recommend this project for any four and five-year-olds (as long as they can wait for the crystals to form!) |
Rocks & Minerals, True or False by Melvin and
Gilda Berger (Scholastic 2010) introduced the children to terms such as minerals and crystals giving them a basis to understand our experiment. Then we examined special rocks - geodes - which contain crystals inside. They created
“eggshell geodes" using three solutions – Epsom salt, Borax, Salt. They were very careful scientists, precisely pouring into containers liquid and minerals and then stirring to make a solution. Lots of vocabulary to learn; mineral, crystal, solution, dissolve. Then it was a matter of waiting patiently for the crystals to form and watching their gradual (very gradual - the instructions I was following said it would only take a few days, but it was actually almost three weeks).
griff waz here
 |
| Foam Art Prints |
To get us in the mood for creating art, we read Mix It Up! by Herve Tullet (Chronicle Books, 2014). To make art prints, we cut square pieces out of foam restaurant take-out containers. The children used a wooden stick to draw a design on the
foam, covered a foam roller in paint, rolled over the foam square, then placed
the painted square on paper and pressed firmly before lifting it off carefully to reveal
the print! This involved several precise steps, and they listened to all the instructions and followed them, and
enjoyed making prints of the same design with different colours, including colour mixes.
 |
| Assembling snowglobes |
 |
| Snowglobes Based on Penguin and Pinecone |
Penguin and Pinecone by Salina Yoon (Bloomsbury USA Childrens, 2012) is a story about friendship and realizing what you need to grow and thrive. The story is engaging and preschoolers totally relate and understand. And, since young children (and certain tourists) also love snowglobes, it made sense to make ones based on the book, using recycled Mason jars.
 |
| Every Snowflake Is Unique and Beautiful. Every Child is Unique and Beautiful. |
|
|
 |
| Say "Glitter" and You've Immediately Got a Captive Audience |
It's not easy to find a new approach to discussing the magic and science of snow with preschoolers, who define being "in the moment" to the extent that they will chant "GO OUTSIDE! GO OUTSIDE!" at the top of their lungs when suddenly it starts to snow. But The Story of Snow: The Science of Winter's Wonder by
Mark Cassino and Jon Nelson (Chronicle Books, 2017) provided a fresh opportunity with its gorgeous photos and accessible info. For our project, the children created their own snow crystals on top of recycled cereal boxes with glue, glitter, and rice.
 |
| Assembling Bird Feeders |
 |
| Milk Carton Bird Feeders Ready to Go |
To understand how, where, and why different birds (and animals in general) spend the winter we read Winter Bees & Other Poems of the Cold by Joyce Sidman & Rick
Allen (HMH Books for Young Readers, 2014) and then Bear Snores On,by Karma
Wilson & Jane Chapman (Little Simon, 2005). We learned that birds that stay in northern climes over the winter sometimes have trouble finding sufficient food sources. So we made bird feeders
out of recycled milk cartons and filled them with a mixture of nuts and seeds that birds in our area prefer.
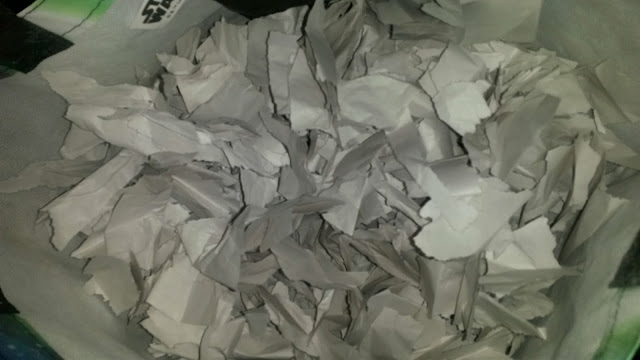 |
| Torn Scraps of Paper, Ready for Recycling |
 |
| Paper Pulp PLUS Glitter |
 |
| Or Yucky Sludge Made Fun With Glitter |
 |
| Spooning Paper Pulp Onto the Deckle and Mold |
 |
| The Children Learned How to Distribute the Pulp Smoothly and Evenly |
 |
| Next Step Was to Press Out the Excess Water Using Felt Pieces |
Right, so, the literary connection here is this: across the world, children go through their daily lives, (usually, sometimes, ideally, oh heck) eating meals with their families, going to school, playing with friends, helping around their home. The commonality and unique nature of these experiences is explored in the delightful and informative book At the Same Moment Around the World by Clotillde
Perrin (Chronicle Books, 2014). I love this book and so worked into the class where we made glitter paper by recycling paper packing sheets. Why not? There's so much to work with here: the universality of communication, the differences in language, alphabets and writing systems, the enduring use of paper in a technological era, the innate human curiosity that spurs us to learn how, why, where, when.
Wind-Down Friday
The idea for this class developed out of the realization that Friday afternoon is Friday afternoon for us all, including preschoolers. The week is almost over, and everyone is tired and, yeah, pretty much done. But even so preschoolers still are ready to go and thus need a structured and free-form environment in which to wind down and yet be engaged. So I spent the past summer studying mindfulness for young children and collecting ideas for sensory activities. Here's what we did.
 |
| Making Breathing Wands |
The first class, we read Taste the Clouds by Rita Marshall and Paolo Domeniconi (Creative Editions, 2016) and It was so quiet I could hear a pin drop by Andy Goodman (Princeton Architectural Press, 2016) to start discussing our senses. We started with breathing: why we breathe, what breathing does for our bodies and brains, what it feels like to breathe fast and short after exercise and what it feels like to take long, slow, deep breaths to calm down and relax, and how we can't usually see our breath (except for frosty winter days). To give the children a visual aid and a way to practice taking a long, deep inhale and full exhale with rounded mouth, we made breathing wands. These were simply paper towel tubes, decorated on the sides, with a loop taped over the top and feathers and ribbons hanging off. When exhaling deeply by mouth, the feathers and ribbons on the wands blow out and dance.
 |
| Ready to Personalize Pebbles |
To continue our exploration of senses and awareness of how we related to each other and the world in which we live we read In This Book by Fani Marceau and Joelle Jolivet (Chronicle Books, Translation Edition, 2014). Then the children decorated four pebbles, each with a different theme that they depicted in their own unique way; flower, mountain, water, and sky. Then we practiced the deep, calm breathing we'd started to learn the previous week using each pebble in turn (for examplle, I breathe in like a fresh growing flower, I breathe out. I breathe in like a solid mountain, I breathe out. I breathe in like a calm pond, I breathe out. I breathe in like the open sky, I breathe out. This was adapted from a technique in A Handful of Quiet: Happiness in Four Pebbles by Thich Nhat Hanh, Plum Blossom, 2008). I've learned that before beginning to teach young children mindful movement, they need to practice breathing.
 |
| Total joy - getting to dump glitter, beads, and sequins into bottles - anything they wanted! |
 |
| Calming Bottle |
The day we made calming bottles, we stopped free play a bit early because the children were so interested in the bottles and piles of glitter, beads, and sequins. They all spent a long time selecting the different materials they wanted and putting them in the bottle, before getting it filled with hand and dish soap (makes a nice slow - but not too slow - cascading effect). We discussed what it feels like to feel calm vs not feeling calm, and they totally understood the concept. So they knew what sorts of feelings might be a good time to shake up the bottle and watch the contents slowly float down. Next we read Who What Where? by Olivier Tallec (Chronicle Books, 2016), which is actually an interactive experience, and they loved listening to the question and examining the pictures carefully to figure out the answer.
I
was fascinated by this book when I came across it, and wondered how it
would in the classroom. I had no idea what a complete hit it would be -
this class loved it and it's "sequel" and they are desperately waiting
for the third book to come out next month (they know that I've
pre-ordered it and that's helping keep the troops calm. For now.). Then we did a series of mindful movements created for kids (from Mindful Movements: Ten Exercises for Well-Being by Thich Nhat Hanh and Wietske Vriezen, Paralllax Press, 2008). They enjoyed this, and there was also a lot of spontaneous downward dog poses ;).
 |
| Numbered Scent Samples |
 |
| Colourful Variety of Scent Samples Indicate Range of Smells |
 |
| Numbered Pictorial Cards Match Scent Samples |
Yoga in the Garden by Kathy Belliveau and Denise Holmes (Simply Read Books, 2016) introduces various animal-themed poses through clues. We paused after each page to try the poses. Downward dog was still by far the favourite, and they found it hilarious to be told to stick out your tongue in class (while doing frog pose!). Then we discussed that not only do our noses let us take big, deep in-breaths to help us either feel calm and give us oxygen and energy while exercising, but of course our noses also allow us to smell, which helps us taste food and makes life more interesting. To explore our sense of smell, we played a scent guessing game with little vials. I was impressed both by how diligently the children sniffed and pondered what each little bottle smelled like and by their guesses, a good number of which were correct, or very closes. Apples, honey, cinnamon, grapes, strawberries, pineapple, grass, and much more!
 |
| Outer Space Sensory Bin |
 |
| Creating Nebulae Art |
We read There's No Place Like Space: All About Our Solar System by Tish Rbe and Aristides Ruiz (Random House Books for Young Readers, 1999) and Galaxies Galaxies by Gail Gibbons (Holiday House, 2006) for
a brief primer (and artistic inspiration) on outer space. I was quizzed on which plastic model represented which
planet and my score shall remain confidential. We explored outer space by playing with a sensory bin, sponge painting stars with glow-in-the-dark shimmer paint, and creating nebulae and galaxies with glue, salt, and liquid water colours.
 |
| Say "slime" and Children Run to Play! |
This day we had
all sorts of different sensory experiences, from playing with "slime"
(everyone got to take home some) to using spirographs and gel pens to make
patterns (a huge hit!) to magnetic swirl bottles. We read Good Night Yoga: A Pose-by-Pose Bedtime Story by Mariam Gates and Sarah Jane Hindler (Sounds True, 2015) and then practiced all the poses described in the book, in addition to our favourites. We talked about imagination, dreaming, balanced, and how most of us balance "better" on one side than the other.
 |
| Exploring the Feel of Goop |
 |
| Painting With Liquid Watercolours |
 |
Layers and Layers of Paint!
So goop is a substance that is simply water and cornstarch, and it's endlessly fun to play with as it's neither solid nor liquid, and it slips through fingers and drips down in a mesmerizing way. Children also loved painting with liquid watercolours, and using watercolour paper is crucial because they tend to keep on adding and layering colours, especially if shimmer or glitter paint is one of the options. They had quite the discussion amongst themselves about which colours they were using, how they mixed, what happened when they put another colour on top, and how to best use the glitter paint for maximum effect. It was fascinating to listen to the artists experiment and discover. The final products were vivid and beautiful and unique. We read Who Done It? by Olivier
Tallec, and the children are so engaged by the pictorial guessing game narrative style and the endearing characters.
|
 |
| Making Zen Gardens |
 |
| Creative Use of Zen Garden Materials! |
 |
Writing and Painting With Water on Inkbrush Practice Paper
One Leaf Rides the Wind by Celeste Mannis and Susan Kathleen Hartung (Puffin Books, 2005) is a beautiful, lyrical account of a young child visiting a Japanese temple garden. After reading, the children got to use
miniature zen garden tools (rakes, tracers, smoothers) as well as small rocks
and pieces of wood to play and arrange sand and make their own zen gardens!
They worked on this for quite a while and had a good time. Then they used
brushstroke paper to draw with water. A wet brush works like paint on
this special paper, which then goes back to its original state when dry. Also
a hit! We tried some new yoga poses from Yoga By The Sea by Kathy Beliveau and Denise Holmes (Simply Read Books, 2015) which is fun because the reader tries to guess which animal the next pose resembles, and
this group loves clues/guessing games and books.
|
 |
| Go Outside! Go Outside! | | |
|
|
|
One Friday mid-December everyone was
feeling quite festive, between holiday
shows, holidays here or almost here, and a magical snowfall during class that
drew everyone to the window (chanting "go outside! go outside!"). Our projects were also festive, as we started growing
snowflake crystals by dipping shaped pipe cleaners into a Borax solution.
We read a book called The Story of Snow The Science of Winter's Wonderby Mark Cassino and Jon Nelson. It explains just how snow crystals
forming, combining to make snow flakes, and features gorgeous photographs of
snow crystals. Our snow crystals of course didn't form by the same process but were still unique, unlike any other, and beautiful ;).
 |
| I could definitely tell that the children both enjoy school and missed being there over the holidays because on the first day back they were very happy to just play together and try out the spirographs - new to them - and some chose to string beads. Snowfall was recent and temperatures frigid, so we read Over and Under the Snow by Kate Messner and Christopher Silas Neal (Chronicle Books, 2014) and discussed the different ways in which how animals and people spend the winter: hibernating, hiding, and hunting as well as skiing, sledding, and making snow angels! |
 |
| It's Something Cool! |
On our last Wind-Down Friday of the
semester we had a great time. The children were amazed at the contraption laid out for
them, with one quote being "Guys! Come over here, it's something
cool!". It was a typewriter, and they had no idea what it was called
or what it could do, but it certainly got their attention! It's a solid
approximately 100-year-old machine, so they can bang on it all want - and they
did! Once they learned that they had to hit only one key at a time if they wanted to produce any
letters on the paper, and how to push the lever to go down a line, and away they
went. We rolled
out balls of lavender-scented play dough, lavender oil having calming
properties when smelled or touched, and then put thumbprints in the
middle. After baking they painted them, and these will come home next
week after drying. The thumbprints can be simply a fun and unique
creation, or can be a tool for the children to rub or hold when they want (or
need!) a minute to take some deep breaths and regroup. We read Over
the Ocean by Taro Gomi (Chronicle Books, 2016) and discussed what friendship means, and how the ocean makes us feel. We ended by doing yoga poses based on the ocean – waves,
dolphins, boats, starfish, etc.